01482 222421


Rising Damp Paint Solutions: Stop Flaking and Peeling UK
Complete Guide to Rising Damp Paint Solutions in the UK
Rising damp is one of the most persistent and frustrating problems facing UK homeowners, particularly in older properties without adequate damp proof courses. The telltale signs - paint flaking and peeling at the base of walls, tide marks, musty smells, and constant redecorating - are all too familiar to thousands of UK property owners. While conventional paint fails repeatedly on rising damp walls, anti-damp paint offers a specialist solution that bonds to damp surfaces and prevents the flaking and peeling cycle. For UK homeowners, landlords, and property professionals dealing with rising damp, understanding the right paint solution is essential for achieving lasting results.

This comprehensive guide explains everything you need to know about painting rising damp walls, from understanding what causes rising damp and why paint fails, to using anti-damp paint, surface preparation, and long-term management strategies.
Understanding Rising Damp
What is Rising Damp?
Rising damp explained:
- Groundwater rising up through walls by capillary action
- Caused by failed, damaged, or missing damp proof course (DPC)
- Common in UK properties built before 1875 (no DPC)
- Also affects properties with damaged or bridged DPC
- Creates characteristic damp band at base of walls
- Typically rises up to 1 metre high
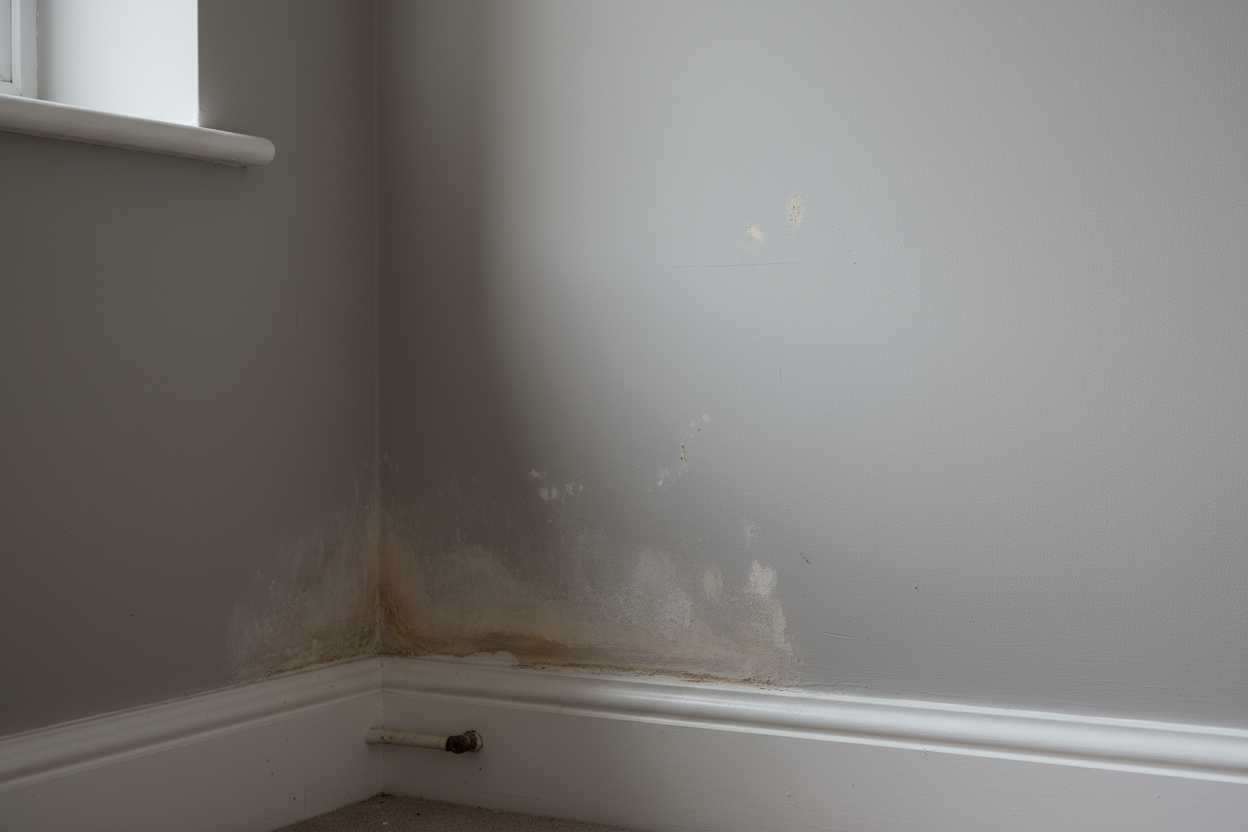
Signs of Rising Damp

Visual indicators:
- Damp band at base of internal walls
- Tide marks and staining (usually up to 1m high)
- Paint flaking and peeling at skirting level
- Wallpaper peeling from bottom up
- White salt deposits (efflorescence)
- Crumbling or damaged plaster
- Dark patches on walls
Other signs:
- Musty, damp smell
- Cold walls at base
- Mould growth at floor level
- Rotting skirting boards
- Damaged floor coverings
Why Rising Damp Causes Paint to Fail
The problem cycle:
- Moisture rises through wall continuously
- Water reaches painted surface
- Pressure builds behind paint film
- Paint cannot release moisture
- Paint bubbles, blisters, and lifts
- Paint flakes and peels away
- Cycle repeats with each repaint
Why conventional paint fails:
- Designed for dry surfaces only
- Forms impermeable barrier
- Traps moisture behind paint
- Cannot cope with constant dampness
- Adhesion fails on wet surfaces
The Root Cause: Damp Proof Course Issues
What is a Damp Proof Course?
DPC explained:
- Waterproof barrier in wall (usually 150mm above ground)
- Prevents groundwater rising up walls
- Required by building regulations since 1875
- Various materials: slate, bitumen, plastic, chemical
- Essential for preventing rising damp
Common DPC Problems
No DPC (pre-1875 properties):
- Many Victorian and older homes never had DPC
- Rising damp inevitable without treatment
- Walls designed to breathe and manage moisture
- Modern impermeable paints make problem worse
Failed DPC:
- Old slate DPC can crack and fail
- Bitumen DPC deteriorates over time
- Chemical DPC may need renewal
- Allows moisture to bypass barrier
Bridged DPC:
- External ground level raised above DPC
- Internal floor raised above DPC
- Render or pointing bridging DPC
- Allows moisture to bypass DPC
Long-Term vs Short-Term Solutions
Permanent Solution: Install or Repair DPC
Professional DPC installation:
- Chemical DPC injection most common
- Physical DPC insertion (more disruptive)
- Addresses root cause of rising damp
- Permanent solution when done correctly
- Professional installation required
- Higher cost but one-time treatment
When to install DPC:
- Severe rising damp throughout property
- No existing DPC (pre-1875 buildings)
- Failed DPC beyond repair
- Long-term property ownership
- Selling property (adds value)
Practical Solution: Anti-Damp Paint
When anti-damp paint is ideal:
- Moderate rising damp
- Cannot afford DPC installation immediately
- Rented property (landlord won't install DPC)
- Period property where DPC not suitable
- Temporary solution while saving for DPC
- Alongside DPC treatment during drying period
What anti-damp paint achieves:
- Manages symptoms of rising damp
- Prevents paint flaking and peeling
- Allows moisture to escape gradually
- Provides long-lasting finish (4-6 years)
- Much lower cost than DPC
- Can be DIY applied
Our Anti-Damp Paint Solutions for Rising Damp
SPO Anti-Damp Paint

SPO Anti-Damp Paint is specifically designed for rising damp walls.
Perfect for:
- Rising damp at base of walls
- Walls with failed or missing DPC
- Period properties with no DPC
- Preventing paint flaking and peeling
- Long-term damp management
Why SPO Anti-Damp Paint works for rising damp:
- Bonds to damp surfaces: Adheres to constantly damp walls
- Moisture release technology: Allows water to escape gradually
- Prevents pressure buildup: Stops flaking and peeling
- Mould inhibitors: Prevents fungal growth
- Flexible coating: Accommodates wall movement
- Breathable: Essential for old buildings
Coo-Var Anti-Damp Paint

Coo-Var Anti-Damp Paint provides durable protection for rising damp walls.
Key features:
- High durability: Withstands constant dampness
- Breathable formula: Allows moisture escape
- Mould resistant: Contains anti-fungal additives
- Professional quality: Trusted by trade
- Multi-surface: Works on plaster, brick, stone
Surface Preparation for Rising Damp Walls
Assessing the Damage
Before starting:
- Identify extent of rising damp
- Check if DPC exists and condition
- Assess plaster condition
- Look for salt deposits
- Check for mould growth
- Determine if damp is moderate or severe
When to call professionals:
- Severe rising damp throughout property
- Structural damage to walls
- Extensive plaster damage
- Uncertainty about cause of damp
- Considering DPC installation
Removing Failed Paint and Wallpaper
- Strip off all loose and flaking paint
- Remove wallpaper completely
- Scrape back to sound surface
- Use scraper and wire brush
- Work systematically from bottom up
- Brush away all loose debris
Dealing with Damaged Plaster
Assessing plaster:
- Tap walls to find hollow areas
- Check for crumbling or soft plaster
- Look for salt contamination
- Determine if replastering needed
Minor damage:
- Remove loose or blown plaster
- Fill with suitable filler
- Sand smooth when dry
- Can paint over with anti-damp paint
Severe damage:
- May need full replastering
- Use breathable lime plaster for old buildings
- Modern gypsum plaster for newer properties
- Allow to dry (but don't wait for complete drying)
- Anti-damp paint can be applied to damp plaster
Treating Salt Deposits (Efflorescence)
What is efflorescence:
- White crystalline salt deposits
- Brought to surface by rising moisture
- Common with rising damp
- Can damage paint and plaster
Treatment:
- Brush off loose salt deposits
- Don't wash off (adds more moisture)
- May reappear as walls dry
- Can paint over with anti-damp paint
- Will eventually stop appearing
Treating Mould Growth
- Treat all mould with fungicidal wash
- Follow product instructions
- Ensure good ventilation
- Allow to dry
- Brush away dead mould
- Anti-damp paint's mould inhibitors prevent regrowth
Application Guide for Rising Damp Walls
Important: Walls Don't Need to Be Dry
Key advantage:
- Anti-damp paint designed for damp walls
- No need to wait for full drying
- Can paint on damp surfaces
- Remove surface water
- Dampness is acceptable and expected
Application Process
Step 1: Final Preparation
- Ensure surface is clean
- Remove all loose material
- Brush away dust and debris
- Check mould treatment complete
- Surface can be damp
Step 2: First Coat
- Stir anti-damp paint thoroughly
- Apply generously with brush or roller
- Work paint into surface
- Ensure complete coverage
- Pay special attention to damp band area
- Allow to dry (follow manufacturer's times)
Step 3: Second Coat
- Check first coat is dry to touch
- Apply second coat
- Ensure even coverage
- Build up protective layer
- Allow to dry fully
Step 4: Third Coat (Recommended for Rising Damp)
- Rising damp benefits from third coat
- Provides maximum protection
- Ensures complete coverage
- Maximizes mould inhibitor protection
- Extends lifespan of finish
Application Tips
- Work in well-ventilated areas
- Apply in temperatures above 5°C
- Don't apply too thick
- Multiple thin coats better than one thick coat
- Allow adequate drying between coats
- Extend coverage above visible damp line
- Paint 30cm above damp band for safety
Managing Rising Damp Long-Term

Complementary Measures
Improve ventilation:
- Ensure good airflow at floor level
- Use airbricks if appropriate
- Don't block vents
- Helps moisture evaporate
External ground levels:
- Check external ground not above DPC
- Lower soil/paving if bridging DPC
- Maintain 150mm gap below DPC
- Ensure drainage away from walls
Internal measures:
- Don't raise internal floor above DPC
- Avoid impermeable floor coverings
- Use breathable materials
- Maintain heating in winter
Maintenance

Regular care:
- Inspect annually for any issues
- Check for new flaking or peeling
- Monitor for mould growth
- Maintain good ventilation
- Address any new damp sources
When to Recoat
Signs it's time to recoat:
- Paint showing wear at base of walls
- Any flaking or peeling appearing
- Damp patches showing through
- Mould growth returning
- Loss of protective properties
Combining Anti-Damp Paint with DPC Treatment
During DPC Installation
Timeline:
- DPC installed professionally
- Walls take months to dry out
- Use anti-damp paint during drying period
- Allows earlier decoration
- Protects walls as they dry
After DPC Installation
Long-term approach:
- DPC prevents new moisture rising
- Existing moisture takes time to dry
- Anti-damp paint manages residual moisture
- Eventually can switch to conventional paint
- May take 1-2 years for complete drying
Period Properties and Listed Buildings
Special Considerations
Old buildings without DPC:
- Many designed to manage moisture naturally
- Breathable materials essential
- Modern impermeable materials cause problems
- Anti-damp paint suitable (breathable)
- Maintains building's ability to breathe
Common Mistakes to Avoid
Preparation Errors
- Not removing all loose paint: New paint will fail
- Painting over salt deposits: Brush off first
- Not treating mould: Will grow through paint
- Ignoring damaged plaster: Repair first
- Using on excessive damp: May need DPC first
Application Errors
- Insufficient coats: Rising damp needs 3 coats
- Not extending above damp line: Paint 30cm above visible damp
- Applying too thick: Multiple thin coats better
- Poor ventilation: Slows drying
Expectation Errors
- Expecting damp to stop: Paint manages symptoms, doesn't cure damp
- Not considering DPC: Long-term solution for severe cases
- Using conventional paint: Will fail on rising damp
- Expecting permanent solution: Will need recoating
Frequently Asked Questions
Will anti-damp paint stop rising damp?
No. Anti-damp paint manages the moisture and prevents paint failure, but it doesn't stop the rising damp itself. For a permanent solution, you need to install or repair the damp proof course.
How long will anti-damp paint last on rising damp walls?
Typically 4-6 years, depending on the severity of the rising damp. More severe damp may require recoating sooner.
Can I use anti-damp paint instead of installing a DPC?
Anti-damp paint is a practical solution for managing rising damp symptoms, but it's not a replacement for a DPC. For severe rising damp, installing a DPC is the permanent solution. Anti-damp paint is ideal for moderate damp or as a temporary solution.
Do I need to wait for walls to dry before painting?
No. Anti-damp paint is designed to be applied to damp walls. You don't need to wait for walls to dry - this is a key advantage over conventional paint.
How many coats do I need for rising damp?
Three coats are recommended for rising damp walls to provide maximum protection and longevity.
Why Choose Specialist Paints Online?
- Rising damp expertise: Understanding of UK damp problems
- Quality anti-damp paint: Professional-grade products with mould inhibitors
- Technical support: Free advice from specialists
- Fast UK delivery: Next day delivery available
- Trusted solutions: Proven products for rising damp
Stop Paint Flaking and Peeling on Rising Damp Walls
Rising damp doesn't have to mean endless cycles of paint flaking and peeling. Anti-damp paint provides a practical, effective solution that bonds to damp surfaces, allows moisture to escape gradually, and prevents the paint failure that conventional paint suffers on rising damp walls.
Whether you're managing rising damp in a period property without a DPC, dealing with a failed damp proof course, or using anti-damp paint during the drying period after DPC installation, professional anti-damp paint delivers long-lasting results that conventional paint simply cannot achieve.
Remember: anti-damp paint manages the symptoms of rising damp and prevents paint failure, but for severe rising damp, installing or repairing the damp proof course is the permanent solution. Anti-damp paint is ideal for moderate rising damp, temporary solutions, or alongside DPC treatment.
Order today for next day UK delivery and stop the flaking and peeling cycle on your rising damp walls.
Contact Us
Need expert advice on painting rising damp walls? Our specialists are here to help.
Contact Details
- Live Chat: Available on our website
- Phone: 01482 222421
- Email: info@specialistpaintsonline.co.uk
Business Hours
- Monday–Thursday: 8:30 AM–5:00 PM
- Friday: 8:30 AM–3:45 PM