01482 222421


Garage Conversion Ideas: Transform Your Garage into a Climbing Training Area
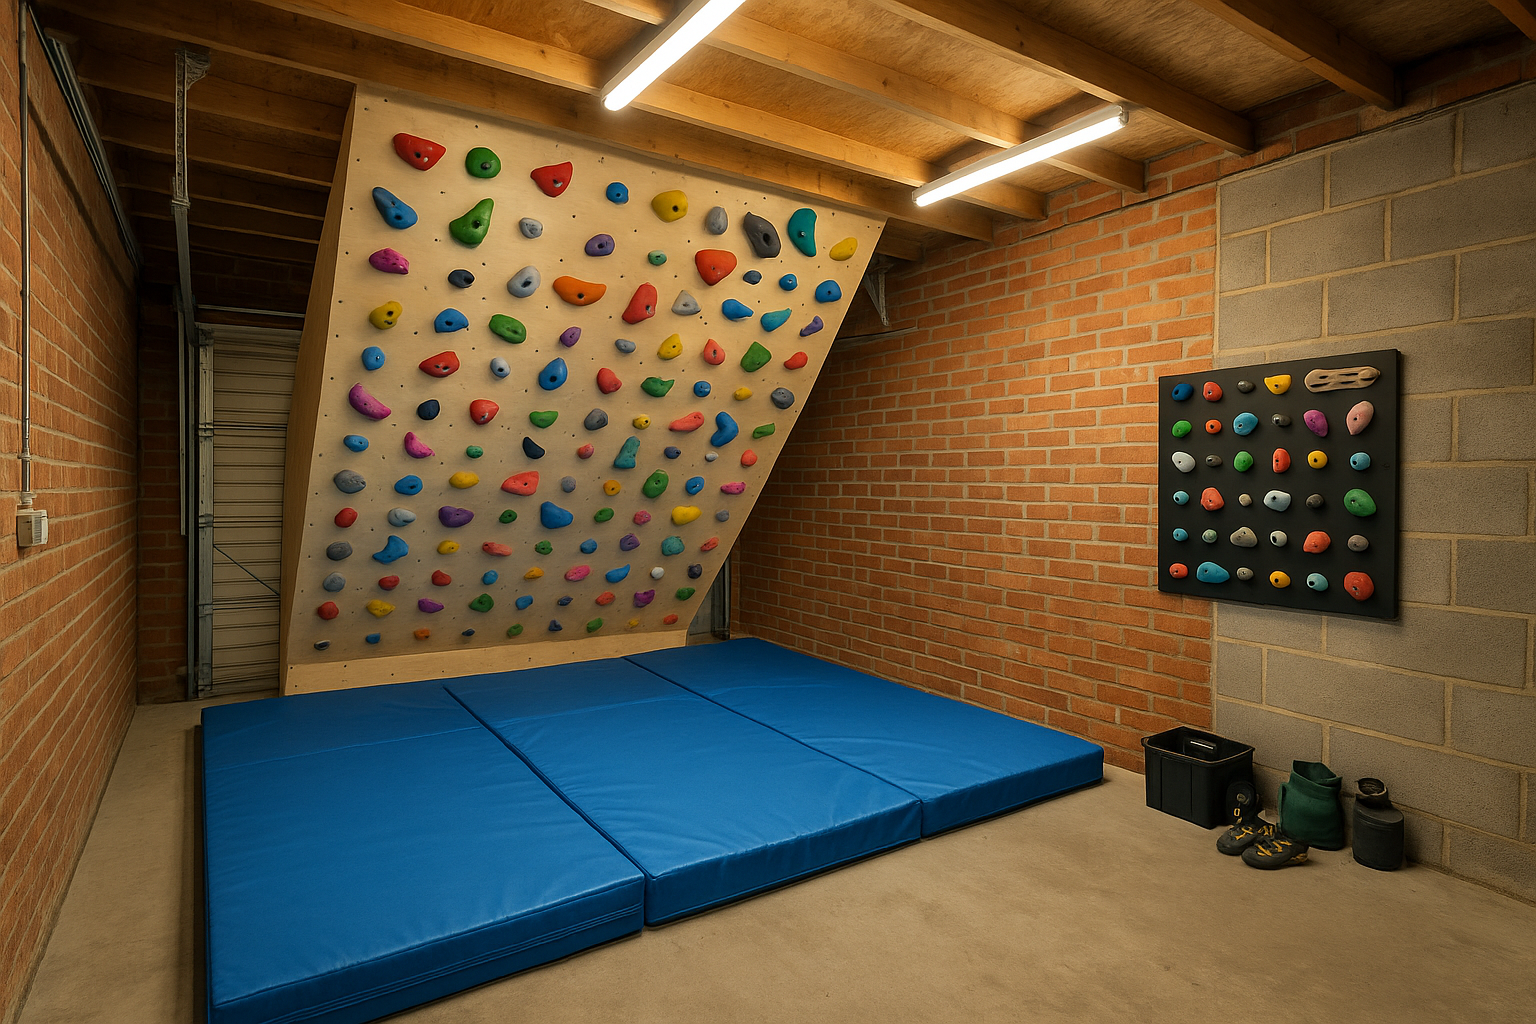
Turn Your UK Garage into the Ultimate Climbing Training Space
Converting your garage into a climbing training area is one of the most rewarding home improvement projects for climbing enthusiasts in the UK. Whether you're a serious climber looking to maintain fitness between outdoor sessions, a parent wanting to create an active space for children, or simply someone who loves climbing, a garage climbing wall offers year-round training opportunities regardless of British weather.
UK garages are ideal for climbing wall conversions—they're typically weatherproof, have adequate ceiling height, and are underutilised spaces in many homes. With proper planning, quality materials like Coo-Var × Rock City Climbing Wall Paint, and some DIY skills, you can transform your garage into a professional-quality climbing training facility.
Why Convert Your Garage into a Climbing Space?
Benefits of a Garage Climbing Wall
- Year-round training: Climb regardless of British weather—rain, wind, or cold
- Convenience: Train at home without travelling to climbing centres
- Cost-effective: Save on gym memberships and travel costs over time
- Flexible training: Climb whenever suits your schedule, day or night
- Family activity: Create a space the whole family can enjoy
- Property value: Unique features can add appeal to your home
- Privacy: Train without crowds or waiting for routes
- Customisable: Design routes and features specifically for your goals
- Weather protection: Keep equipment and crash mats dry and protected
Why Garages Work Perfectly
UK garages offer several advantages for climbing wall conversions:
- Adequate ceiling height (typically 2.4-3m+)
- Solid walls suitable for mounting climbing structures
- Weather protection and insulation
- Existing lighting and power supply
- Separate from main living areas (noise and chalk dust contained)
- Often underutilised or used for storage only
- Good ventilation options
- Concrete floors ideal for crash mats
Planning Your Garage Climbing Conversion
Assessing Your Garage
Before starting, evaluate your garage's suitability:
Dimensions:
- Measure height, width, and depth accurately
- Minimum 2.4m ceiling height for bouldering walls
- Consider space needed for crash mats (1.5m from wall base)
- Account for door swing and access requirements
Structural Considerations:
- Check wall construction (brick, block, or timber frame)
- Assess wall strength and load-bearing capacity
- Identify wall studs or fixing points
- Consider consulting a structural engineer for large projects
- Check for damp or moisture issues
Access and Usage:
- Will you still need vehicle access?
- Can you dedicate the entire garage or just one wall?
- Consider storage needs for climbing equipment
- Think about heating and lighting requirements
Design Options for Garage Climbing Walls
Full Wall Coverage:
- Maximum climbing surface area
- Multiple route options
- Best for dedicated climbing spaces
- Requires giving up vehicle storage
Single Wall Installation:
- Maintains some garage functionality
- Good compromise for mixed-use spaces
- Still provides substantial training area
- Easier to construct and less expensive
Freestanding Structure:
- Doesn't require wall mounting
- Can be moved or removed if needed
- Good for rental properties
- Requires more floor space
Angled or Overhanging Walls:
- Increases difficulty and training intensity
- Develops power and technique
- Requires more complex construction
- Needs strong structural support
Training Board/Spray Wall:
- Dense hold placement for specific training
- Excellent for building strength and endurance
- Typically vertical or slightly overhanging
- Popular with serious climbers
Step-by-Step Garage Conversion Process
Step 1: Clear and Prepare the Space
- Remove all items from the garage
- Deep clean walls, floor, and ceiling
- Assess and repair any damage or damp issues
- Consider insulation if garage is unheated
- Plan electrical work for lighting and heating
- Ensure adequate ventilation
Step 2: Design Your Layout
- Measure and mark wall dimensions
- Plan climbing wall size and angles
- Design hold placement grid (typically 200mm spacing)
- Consider route variety and difficulty levels
- Plan crash mat coverage area
- Allow space for training equipment (hangboard, rings, etc.)
Step 3: Build the Wall Structure

Materials Needed:
- 18mm plywood sheets (exterior grade recommended)
- Timber framing (50mm x 100mm or 75mm x 100mm)
- M10 T-nuts (calculate based on 200mm grid)
- Wood screws and fixings
- Wall anchors or bolts for mounting to garage walls
- Angle brackets for additional support
Construction Process:
- Build timber frame attached securely to garage walls
- Ensure frame is level, plumb, and square
- Attach plywood sheets to frame with screws every 150mm
- Drill T-nut holes in 200mm grid pattern
- Install T-nuts from the back of plywood
- Sand all surfaces smooth and remove splinters
- Reinforce joints and high-stress areas
Step 4: Apply Climbing Wall Paint
This crucial step creates the grippy, durable surface climbers need.
Why Specialist Paint is Essential:
- Standard paint becomes dangerously slippery
- Climbing wall paint provides necessary friction
- Professional formulation withstands heavy use
- Maintains grip properties over time
- Safe for regular hand and foot contact
Recommended: Coo-Var × Rock City Climbing Wall Paint


This professional-grade paint offers:
- Optimal textured grip for hands and feet
- Durability for intensive training use
- The same quality used in UK climbing centres
- Easy application for DIY projects
- Long-lasting performance
- Available in multiple colours
Application Process:
- Ensure surface is clean, dry, and dust-free
- Stir paint thoroughly to distribute texture additives
- Apply first coat with roller, working systematically
- Allow to dry (4-6 hours)
- Apply second coat for optimal texture
- Cure for 48 hours before installing holds
Step 5: Install Climbing Holds and Features
- Plan route layout and hold placement
- Bolt on holds using appropriate bolts and Allen keys
- Create routes of varying difficulty
- Consider adding volumes or features for variety
- Ensure all holds are securely tightened
- Test each hold before use
Step 6: Safety and Finishing Touches
- Install crash mats covering entire fall zone
- Ensure mats are thick enough (minimum 100mm)
- Add adequate lighting (LED panels work well)
- Consider heating for winter use
- Install storage for holds, chalk, and equipment
- Add training equipment (hangboard, rings, etc.)
- Create a comfortable training environment
 Essential Features for Your Garage Climbing Space
Lighting
- Bright, even lighting across the entire wall
- LED panels or strip lighting recommended
- Minimum 500 lux for safe climbing
- Consider adjustable or dimmable options
- Ensure no shadows on climbing surface
Heating and Ventilation
- Heating makes winter training comfortable
- Electric panel heaters or infrared heaters work well
- Maintain minimum 15°C for comfortable climbing
- Ensure good ventilation to control chalk dust
- Consider extractor fan or open windows
Flooring and Crash Mats
- Professional bouldering mats (100-150mm thick)
- Cover entire landing zone (1.5m+ from wall)
- Multiple mats to eliminate gaps
- Consider foam flooring for additional protection
- Keep mats clean and in good condition
Storage Solutions
- Wall-mounted storage for holds and equipment
- Shelving for chalk bags, shoes, and gear
- Hooks for training equipment
- Organised system for different hold types
- Keep floor clear for safety
Training Equipment
- Hangboard mounted on strong wall section
- Gymnastic rings or TRX straps
- Pull-up bar
- Resistance bands
- Foam roller and stretching area
- Timer or training app setup
Legal and Safety Considerations
Building Regulations and Planning Permission
- Internal garage conversions typically don't require planning permission
- Structural changes may need building control approval
- Check with local authority if unsure
- Ensure electrical work complies with regulations
- Consider professional inspection for peace of mind
Insurance
- Inform home insurance provider of conversion
- May affect policy terms or premiums
- Ensure adequate liability coverage
- Document construction and safety measures
Safety Standards
- Ensure structural integrity of wall mounting
- Use appropriate fixings and load ratings
- Maintain adequate crash mat coverage
- Regular inspection and maintenance schedule
- Supervise children and inexperienced climbers
- Establish clear safety rules
Maximising Your Training Space
Route Setting Tips
- Create routes of varying difficulty
- Change routes regularly to maintain interest
- Use coloured tape to mark different routes
- Include technical and powerful problems
- Set routes that target specific weaknesses
- Leave some holds for freestyle climbing
Training Programme Ideas
- Structured sessions with warm-up and cool-down
- Endurance circuits on easier routes
- Power training on hard, short problems
- Technique drills and specific movements
- Hangboard sessions for finger strength
- Cross-training with rings and bodyweight exercises
Maintaining Motivation
- Set specific training goals
- Track progress and improvements
- Invite friends for training sessions
- Create challenges and competitions
- Vary routes and training styles
- Keep the space clean and inviting
Maintenance and Upkeep
Regular Maintenance Tasks
- Weekly: Brush chalk off holds and wall, check for loose holds
- Monthly: Tighten all hold bolts, vacuum crash mats
- Quarterly: Deep clean wall surface, inspect structure
- Annually: Check paint condition, replace worn holds, structural inspection
Long-term Care
- Touch up paint in high-wear areas as needed
- Replace damaged or worn holds promptly
- Monitor crash mat condition and replace when compressed
- Check structural integrity regularly
- Update routes to maintain interest
- Keep training equipment in good condition
Transform Your Garage Today

Converting your UK garage into a climbing training area is an achievable project that delivers incredible value for climbing enthusiasts and families. With proper planning, quality materials including Coo-Var × Rock City Climbing Wall Paint, and attention to safety, you can create a professional-quality training facility in your own home.
Whether you're a serious climber looking to maintain peak fitness, a parent creating an active space for children, or simply someone who loves climbing, a garage climbing wall offers year-round training opportunities that will enhance your climbing and provide endless enjoyment.
The investment in time and materials pays dividends through improved climbing performance, family fitness, and the convenience of training at home whenever you want, regardless of British weather.
Contact Us
Need advice on your garage climbing wall conversion? Our team is here to help with product recommendations and technical guidance.
Contact Details
- Live Chat: Available on our website
- Phone: 01482 222421
- Email: info@specialistpaintsonline.co.uk
Business Hours
- Monday–Thursday: 8:30 AM–5:00 PM
- Friday: 8:30 AM–3:45 PM